
PRISM Surface Materials
PRISM Surface materials are HDRP materials with a fixed triplanar and tangent-space-normal contract. They are intended for broad receiver surfaces such as walls, floors, rocks, and modular architecture—not for transparent Mesh Quad cards.
Open Tools > PRISM Surface > Material Tool to author materials, or select a PRISM Surface material to use its custom Inspector. The Material Tool has Surface and Decal tabs. Surface sub-tabs are Sources, General, Emission, Variation, and Advanced; Decal sub-tabs are Sources, Projection, Opacity, Blend, and Advanced.
Use Load Selected to load the current selection, Load Compatible to choose a compatible material, New Blank Draft to start a draft, Apply to write the loaded material, and Save As New to create a new asset. Instantly Apply Changes writes supported changes to the loaded material as you edit; use normal Unity Undo to reverse an intentional edit.
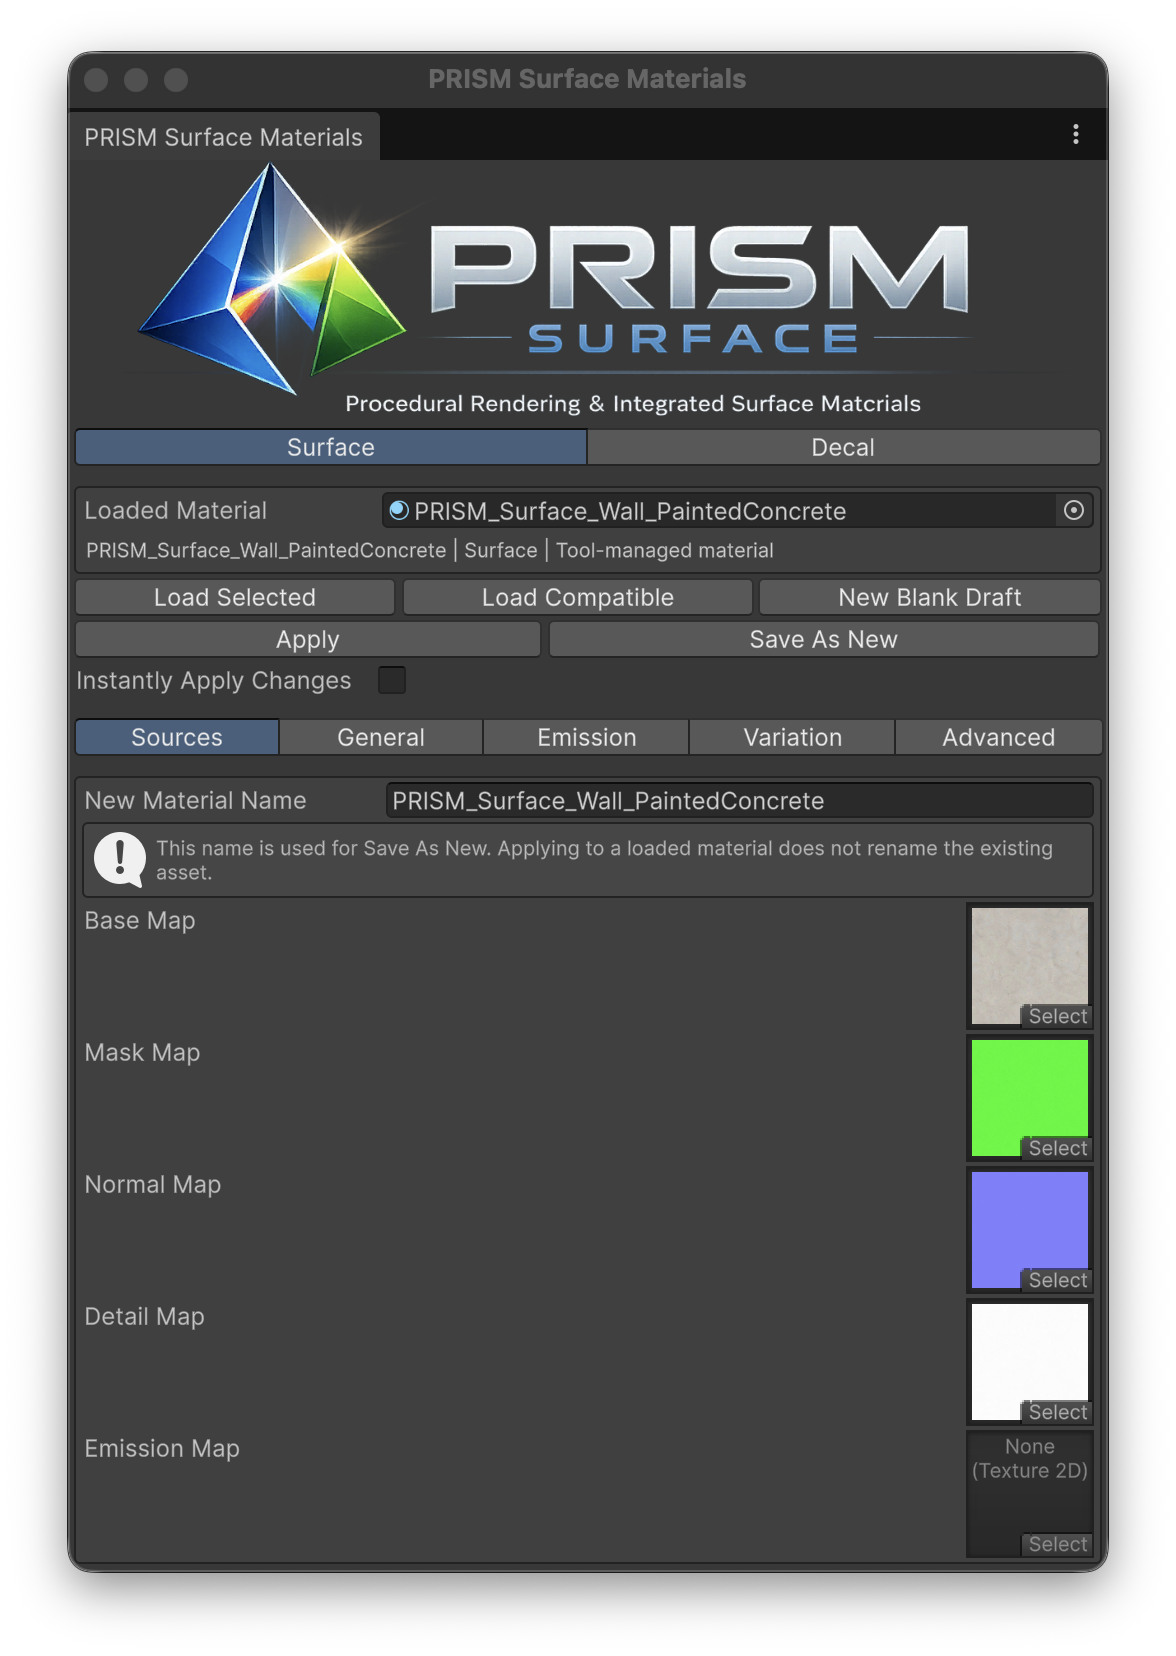
Surface material authoring with load, apply, save, and Surface subtab controls.
Surface mapping and maps
Section titled “Surface mapping and maps”Texture Mapping reports Triplanar. Mapping Space selects World Space or Object Space; World Scale controls projected texture size; Blend Sharpness controls how strongly the dominant triplanar axis wins. PRISM uses a shared sampling space so Base, Mask, Normal, Detail, and Emission remain aligned.
Assign source maps in the Surface Sources tab. The custom PRISM Inspector deliberately exposes the source, mapping, variation, emission, and macro controls implemented by the shader rather than unsupported generic HDRP Lit mapping or tessellation controls. Projection Bias is not an artist control in the current PRISM sampling workflow.
UV Variation
Section titled “UV Variation”Enable UV Variation, choose a Variation Mode, and set Variation Seed.
Random Cellsrandomly rotates or mirrors whole tile-local coordinates while preserving the original tile footprint. It offers more variety, but non-matching source edges can remain visible.Matched Edgesmirrors neighboring tiles so their shared source-texture borders match. It has more constrained variation, but is preferable when edge continuity matters.
UV Variation happens before anti-tiling. Start with it off while tuning a new anti-tile setup, then add it if the source still looks repetitive. All active material layers use the same transformed coordinates.
Anti-Tile Mode
Section titled “Anti-Tile Mode”| Mode | Use it when | Cost guidance |
|---|---|---|
None |
Repetition is already acceptable or material cost is the priority. | Lowest cost. |
Pattern Variation |
You want the established multi-sample pattern approach. | Fast (4), Quality (9), and Extreme (16) trade more samples for more variation. |
Stochastic Tiling |
Repetition is obvious over broad walls, floors, or curved surfaces. | Four deterministic candidates per projection; use only where it improves the visible result. |
Pattern Variation exposes Anti-Tile Scale, Cell Blend Width, optional Stochastic Blend, Pattern Samples, Pattern Cell Size, Pattern Offset Strength, and Pattern Scale Strength. Start with Fast, then move to Quality or Extreme only when the visible improvement justifies the cost.
Stochastic Tiling crossfades four deterministic neighboring candidates. Base Color, Mask, Normal, Detail, and Emission use aligned candidate selection. It uses procedural seeds and does not require a Blue Noise texture assignment.
For Stochastic Tiling, tune in this order:
Anti-Tile Scalecontrols how often variation regions change; higher values make smaller, more frequent regions.Cell Blend Widthcontrols how broadly candidates crossfade. A seam-safe internal transition remains at very low values.Jitter Strengthoffsets candidates. Raise it gradually; distinctive artwork can look ghosted when it is too high.Blend Sharpnessreshapes the crossfade. Lower values are softer; higher values favor one candidate more strongly and can reveal transitions.
Stochastic Tiling is roughly four times the sampling work of None per active texture layer, while the Pattern modes use their selected multi-sample pattern paths. Treat these as design tradeoffs, not a substitute for profiling the target scene and hardware.
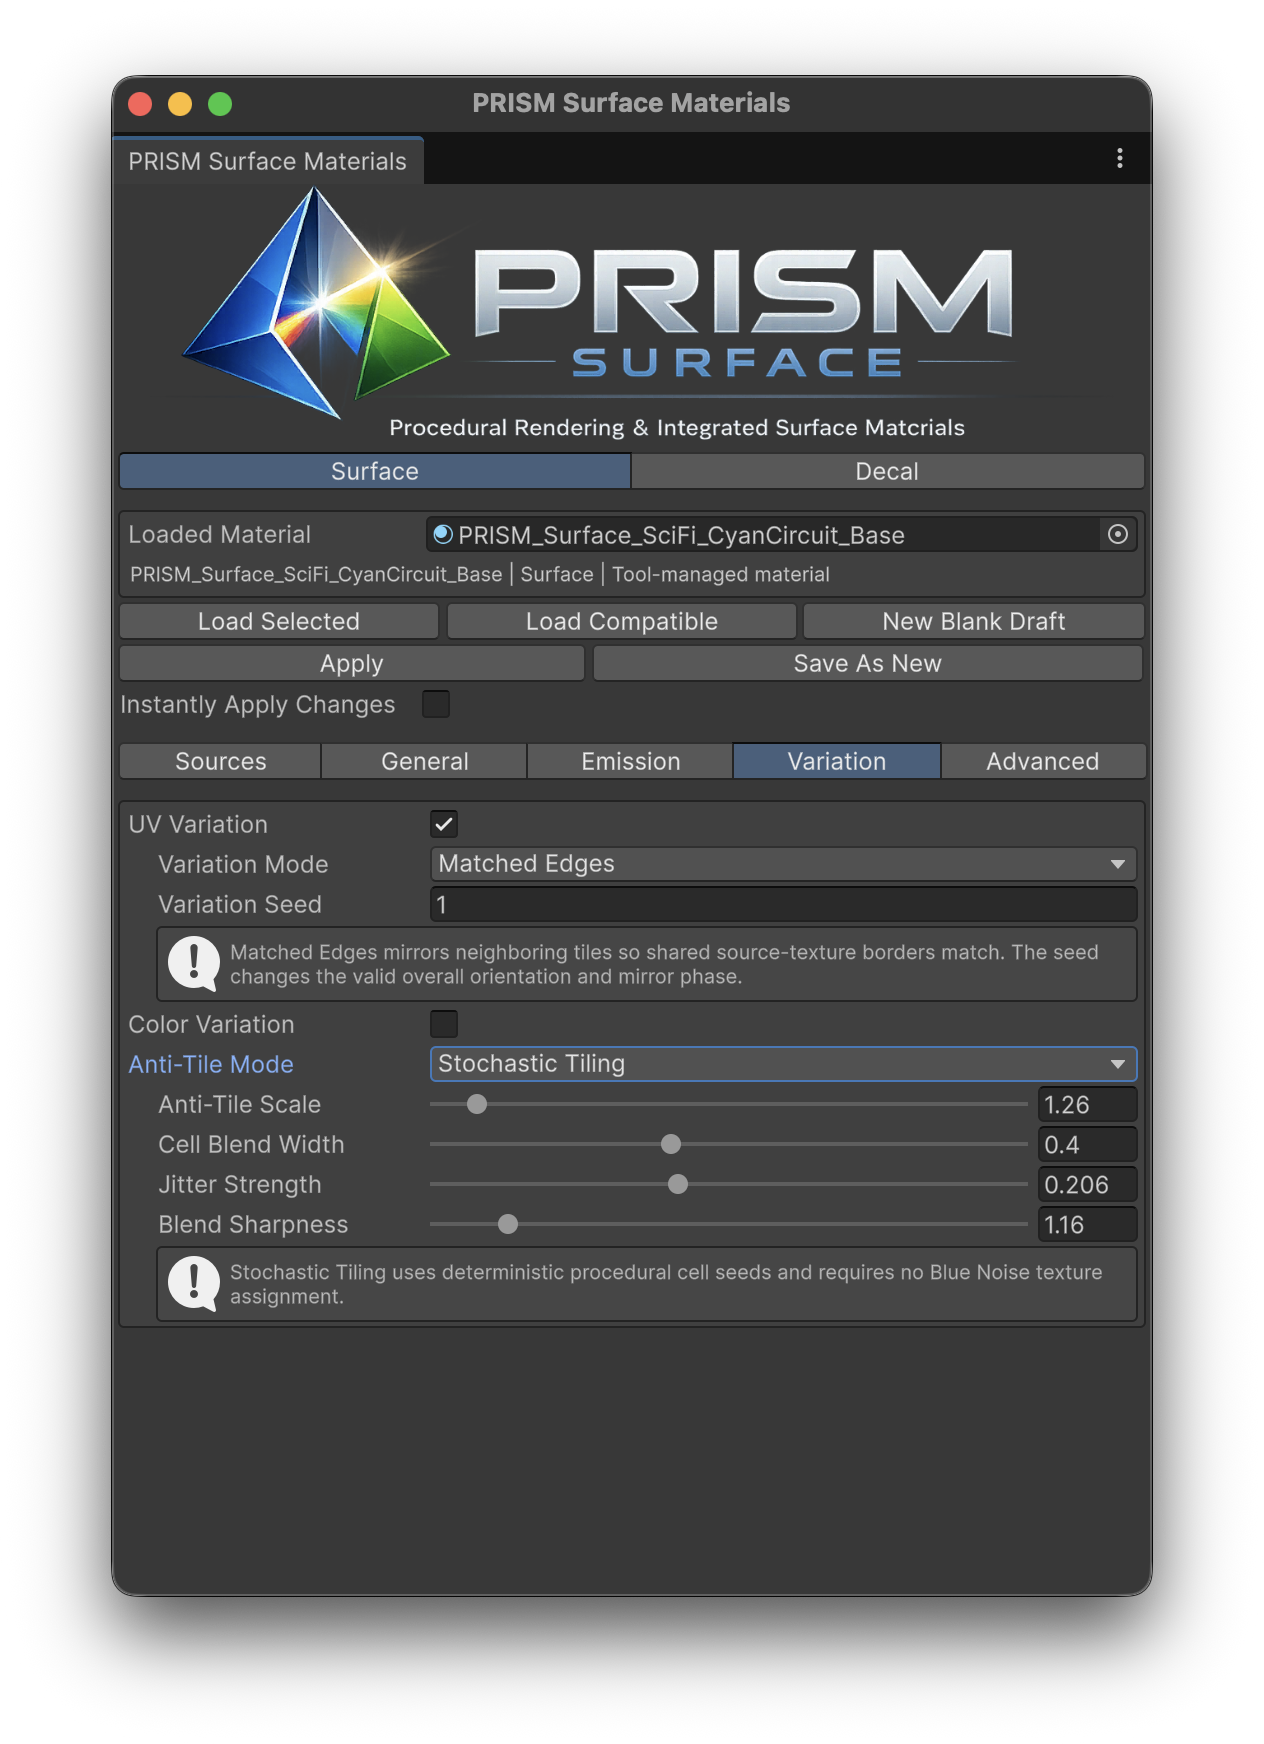
Stochastic Tiling controls in the Material Tool Variation tab.
Emission and macro variation
Section titled “Emission and macro variation”Assign an Emission Map, then adjust Emission Intensity (HDR), Exposure Weight, tint, threshold/core controls, and base visibility controls as appropriate. Exposure Weight 0 keeps a stylized glow more stable as exposure changes; 1 makes it fully exposure-dependent and can need much larger HDR values in bright daylight. Test emission in the intended exposure setup.
Macro Variation Texture, Strength, Scale, Contrast, and optional animation break broad uniformity. Animated macro variation can use Use Slope Flow and Slope Speed Influence, or a world-space flow direction. Keep this subtle: its purpose is large-scale surface variation, not a visibly moving overlay.
The Decal Material Tool includes source maps, global opacity, Draw Order (-50..50), channel-affect toggles, metallic/smoothness/AO controls, and blend/advanced settings. Use it to create the material assigned to HDRP Decal output, not as a replacement for the receiver’s PRISM Surface material.
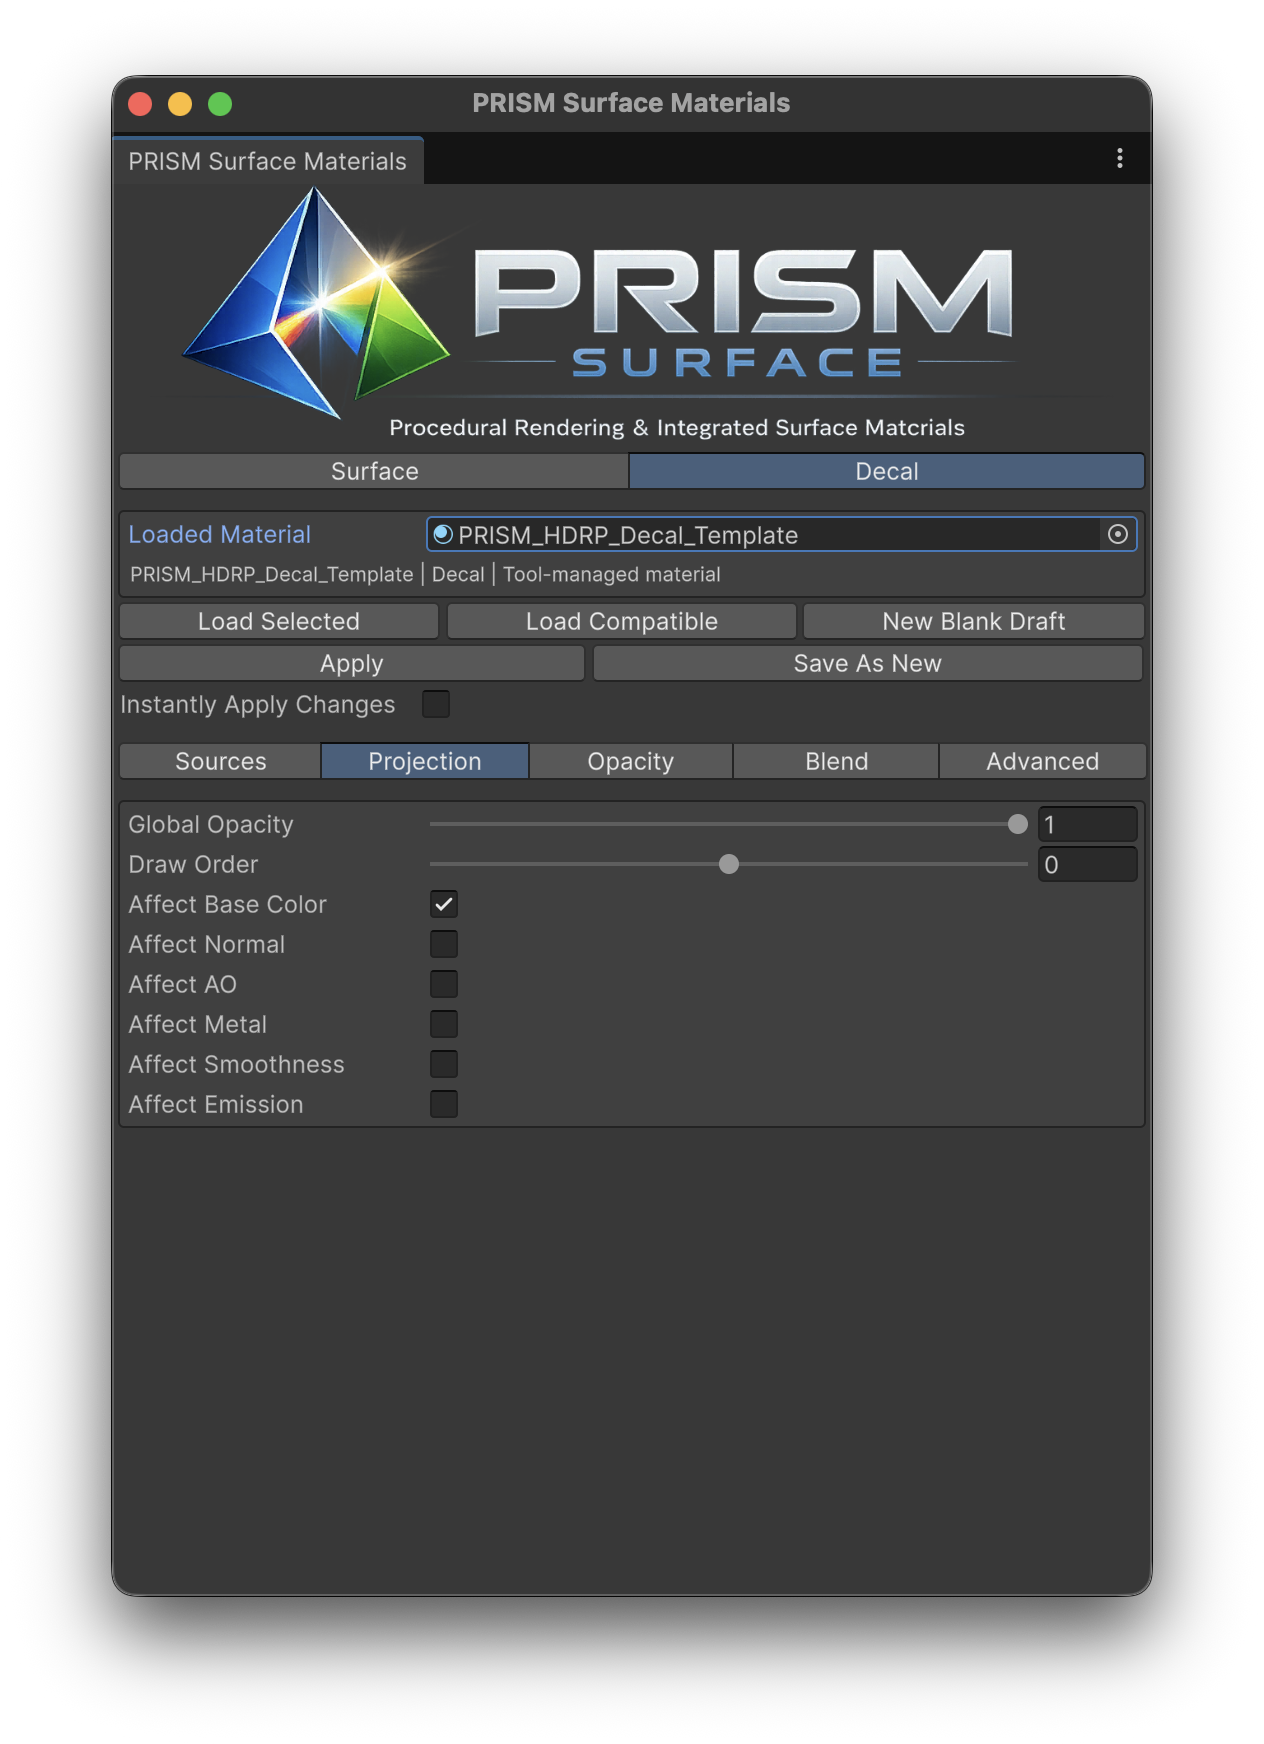
Decal Projection controls, including opacity, draw order, and channel-affect toggles.
Next: PRISM Material Converter.